
Introduction to HubSpot CRM
HubSpot is a leading customer relationship management (CRM) which helps marketing team to generate leads, manage customer data, develop pipelines and many more . Hubspot was founded in June 2006, Cambridge, Massachusetts, United States. I will try to cover in detail here how HubSpot Integration with Drupal eventually happen.
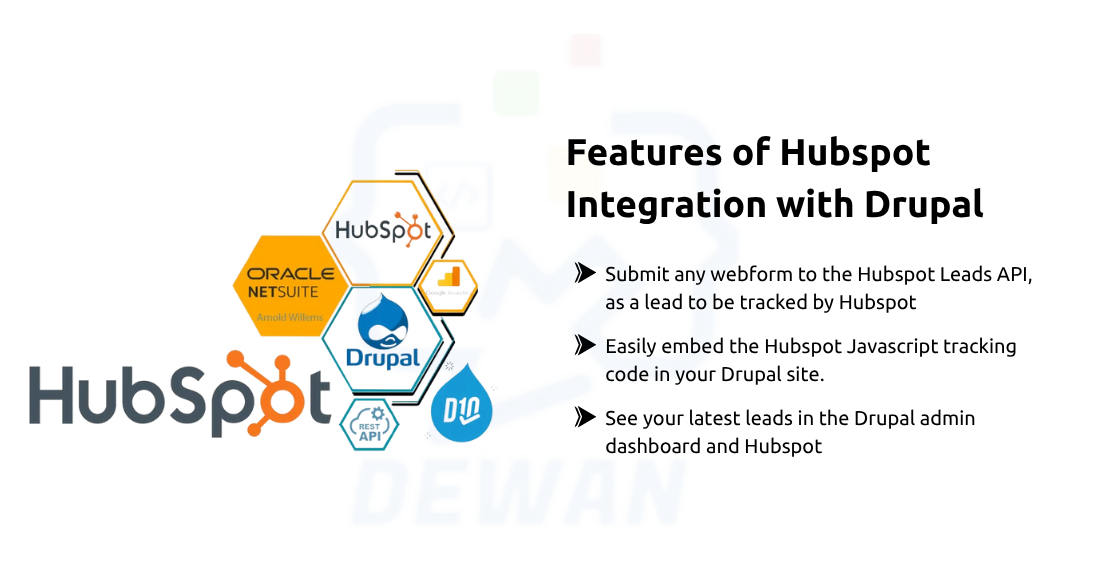
HubSpot has emerged as a comprehensive platform for inbound marketing, offering tools and solutions to help businesses attract, engage, and delight customers.
Download & Install Module to Integrate HubSpot with Drupal
If you need Drupal forms to send data to your HubSpot account, you need to install & configure Drupal HubSpot module. So, in case, if you are using Drupal 11 on your website as a core version, then the latest stable version for Hubspot module is "hubspot 3.0.0-rc2". So run the following command on your drupal root directory to install this module.
composer require 'drupal/hubspot:^3.0@RC'This command will automatically download the HubSpot module from Drupal.org and will save it on your drupal directory : /modules/contrib/hubspot
Now you should enable the module using the following drush command:
drush en hubspot -yConfigure HubSpot integration settings
After enabling the module, navigate to the configuration page for the HubSpot module. You can typically find this under the "Configuration > Web services > HubSpot integration settings":
Configuration URL : /admin/config/services/hubspot
You need following information on this form. You can collect this information from your HubSpot account. I'll provide all details step by step here:
- HubSpot Portal ID
- HubSpot Client ID
- HubSpot Client Secret
- HubSpot Scope
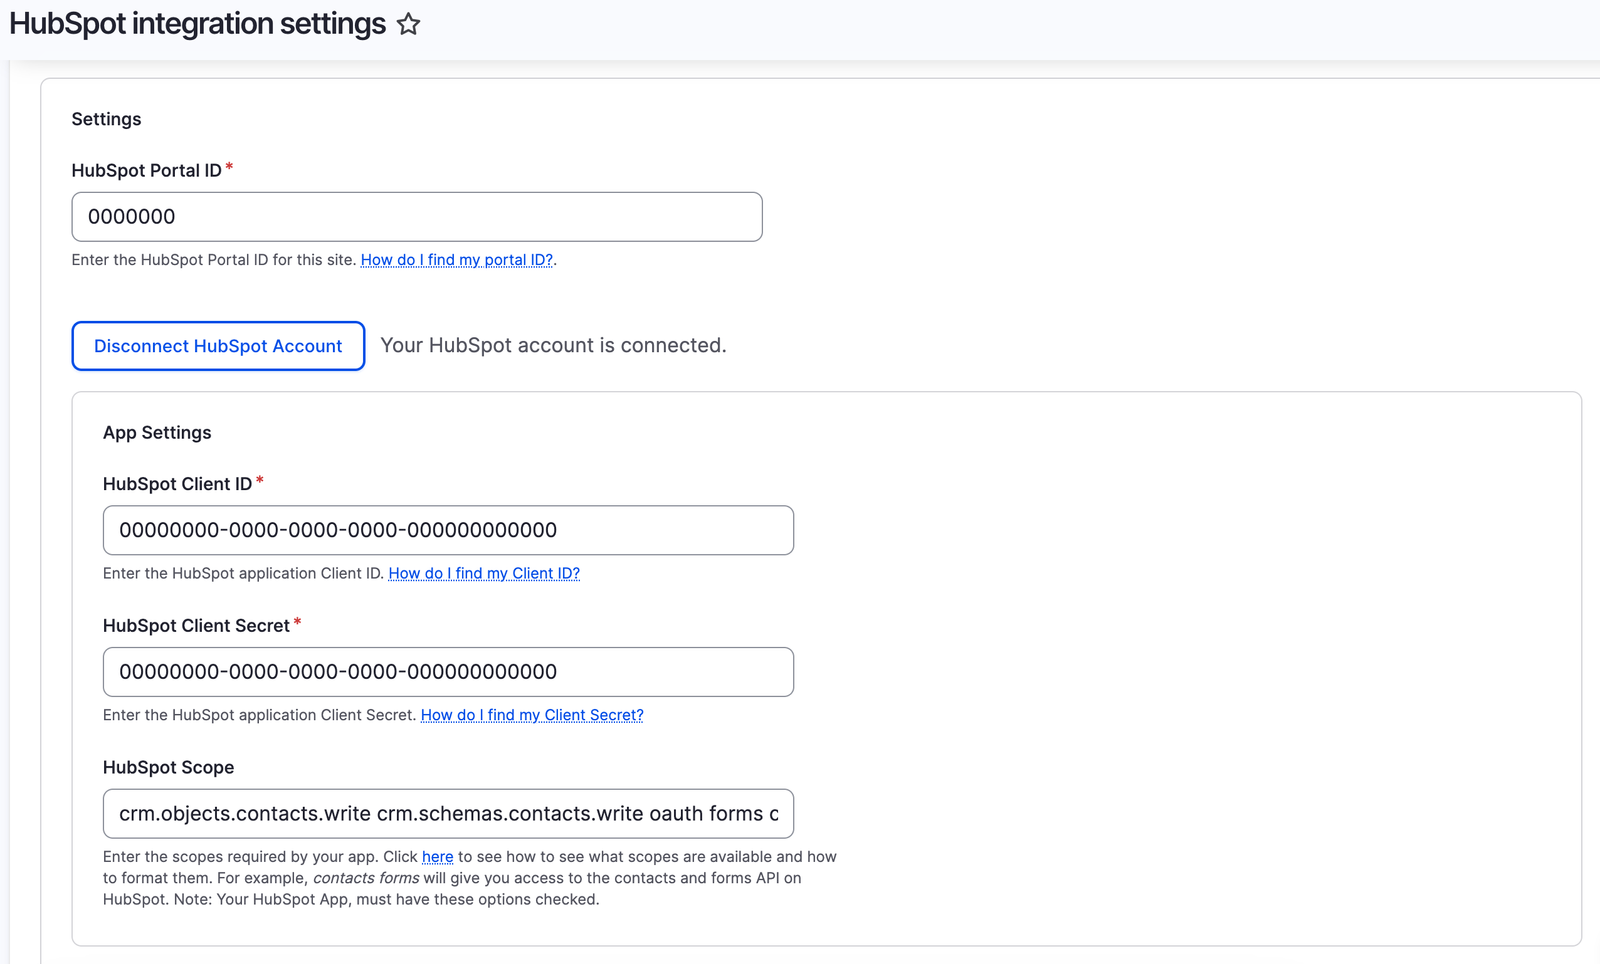
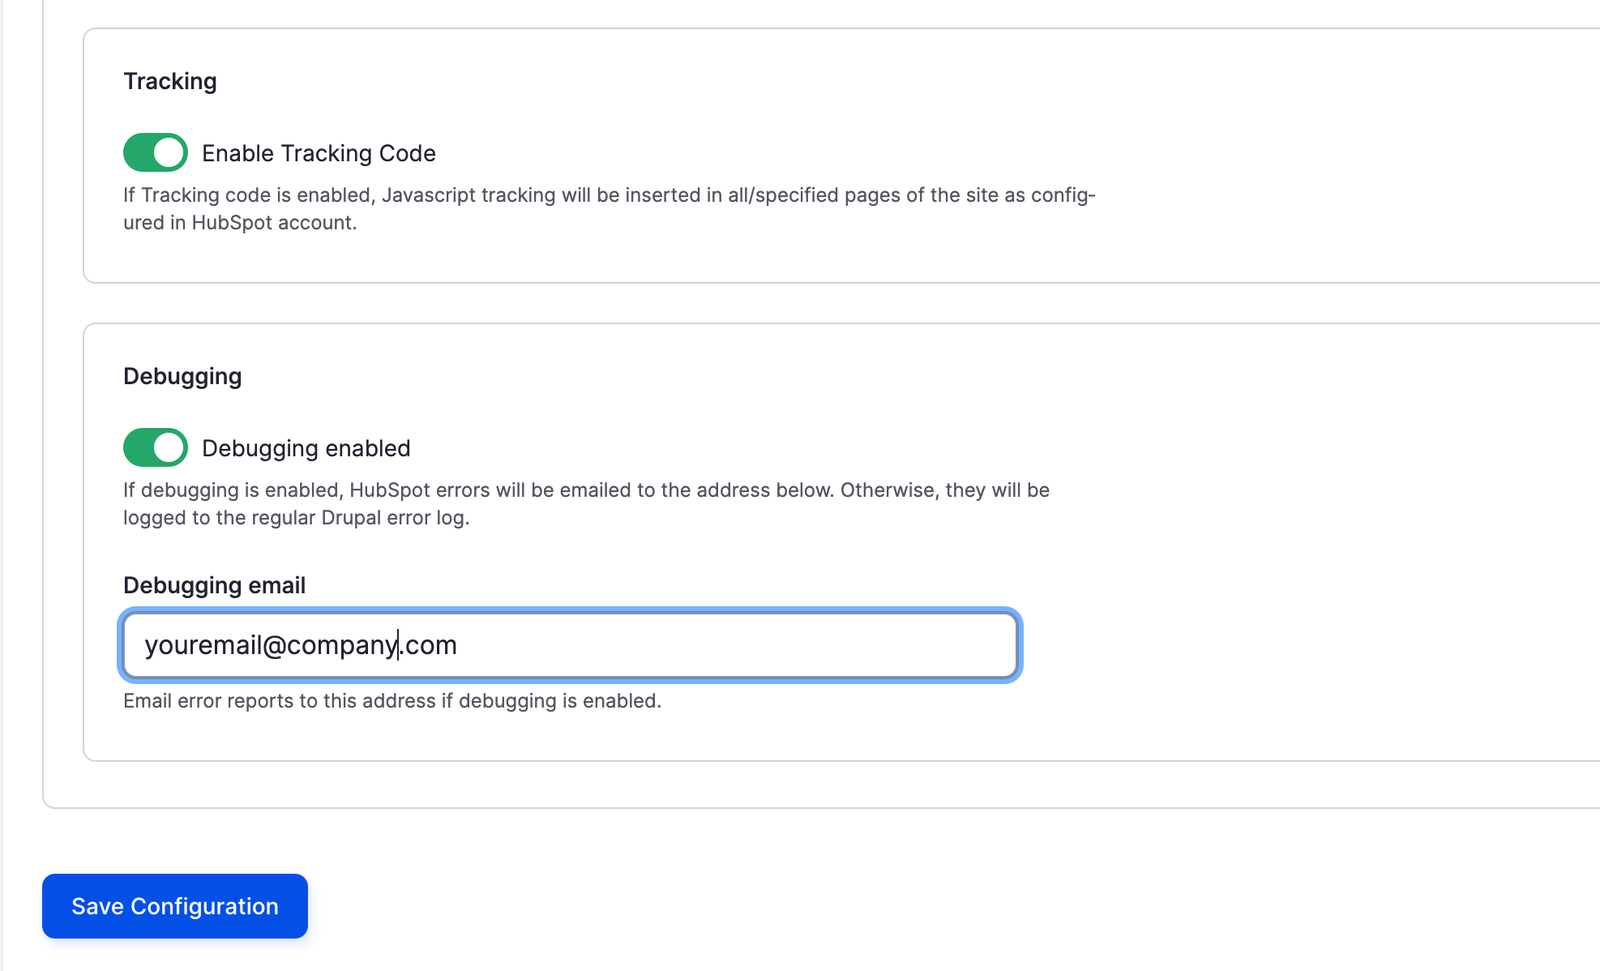
Enable tracking and debugging options available on this page as you can find them on bottom of the page and save configuration.
You can now login to your HubSpot account to gather above required information:
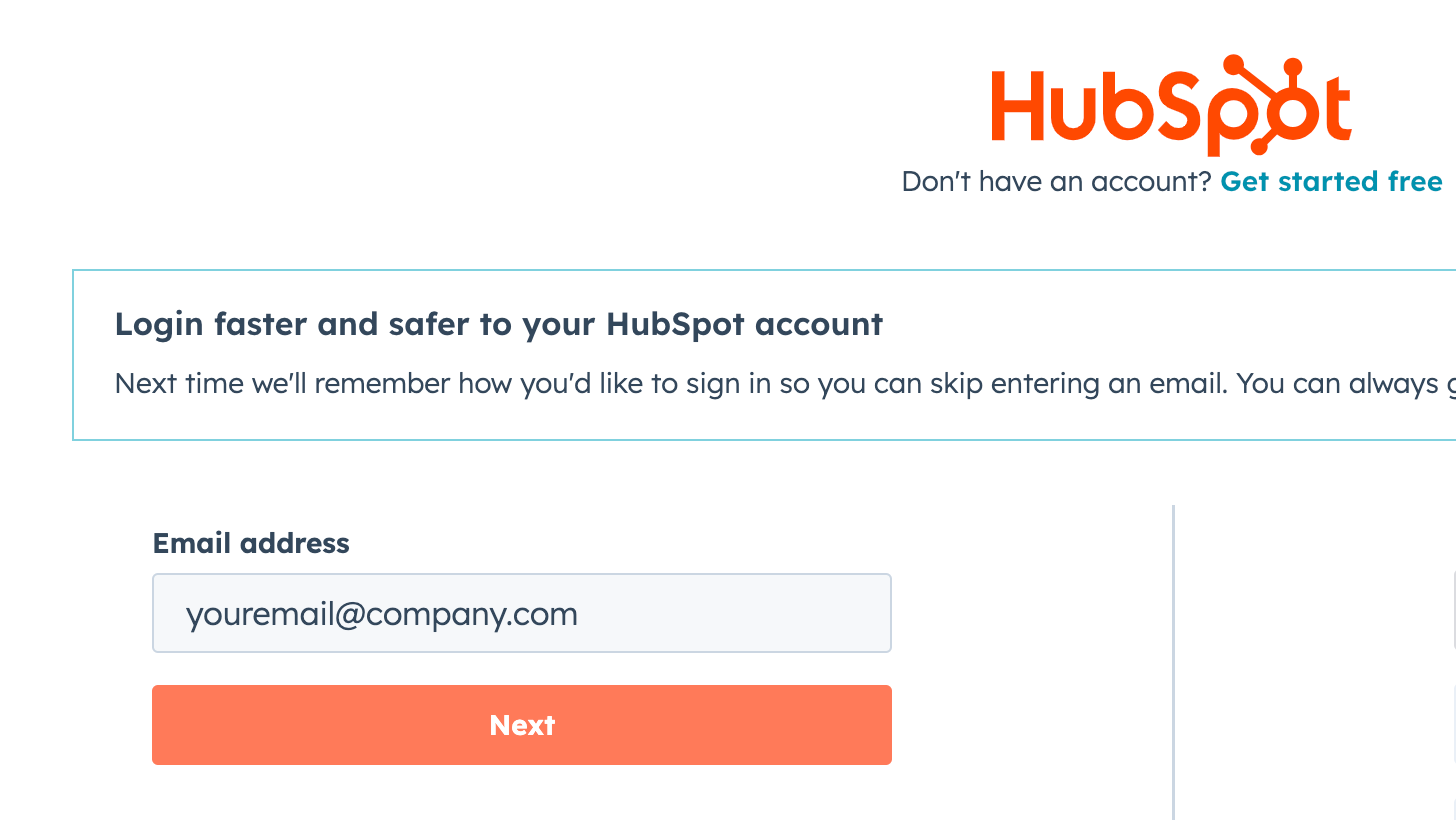
Click on this link to find Portal ID : https://app.hubspot.com/myaccounts. In this following screen, '0000000' is the sample Portal ID.

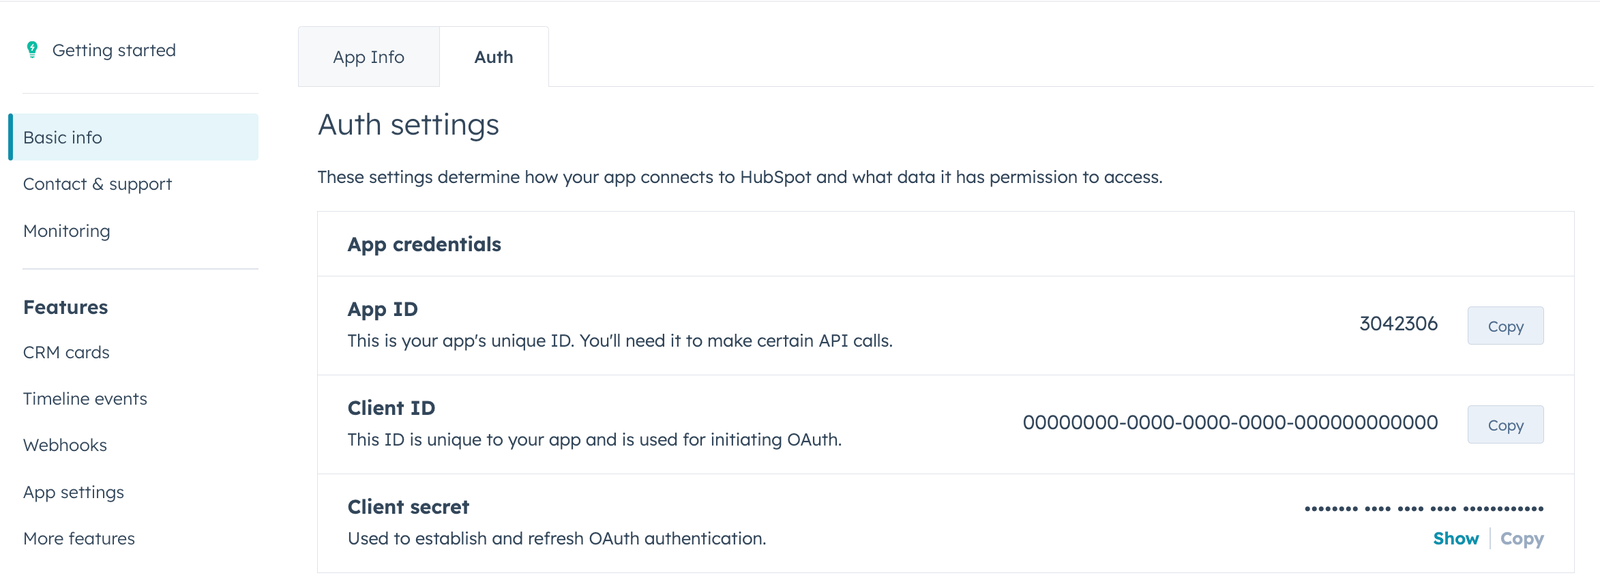
Click on 'Apps' tab from left side bar in your HubSpot account to find all apps.
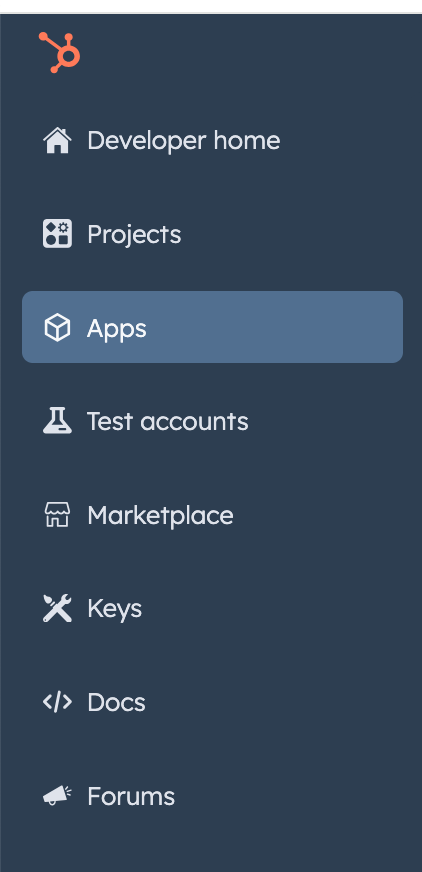
Then click on 'YourAppName' and select 'Auth' tab to find "Client ID" and "Client Secret" details :
Contact Drupal Developer with Hubspot Expertise to help you HubSpot Integration with your Drupal websites.
Test HubSpot Integration with Drupal Website
After configuring the integration, it's essential to test it thoroughly to ensure that data is being synchronized correctly between Drupal and HubSpot. Test form submissions, tracking codes, and any other features you've enabled.
Sync Drupal Forms and Configure Integration
Once the API key is configured, you can set up form integrations like Drupal webforms and other settings based on your requirements. This may involve syncing Drupal forms with HubSpot, configuring tracking codes, and setting up other features provided by the HubSpot module.
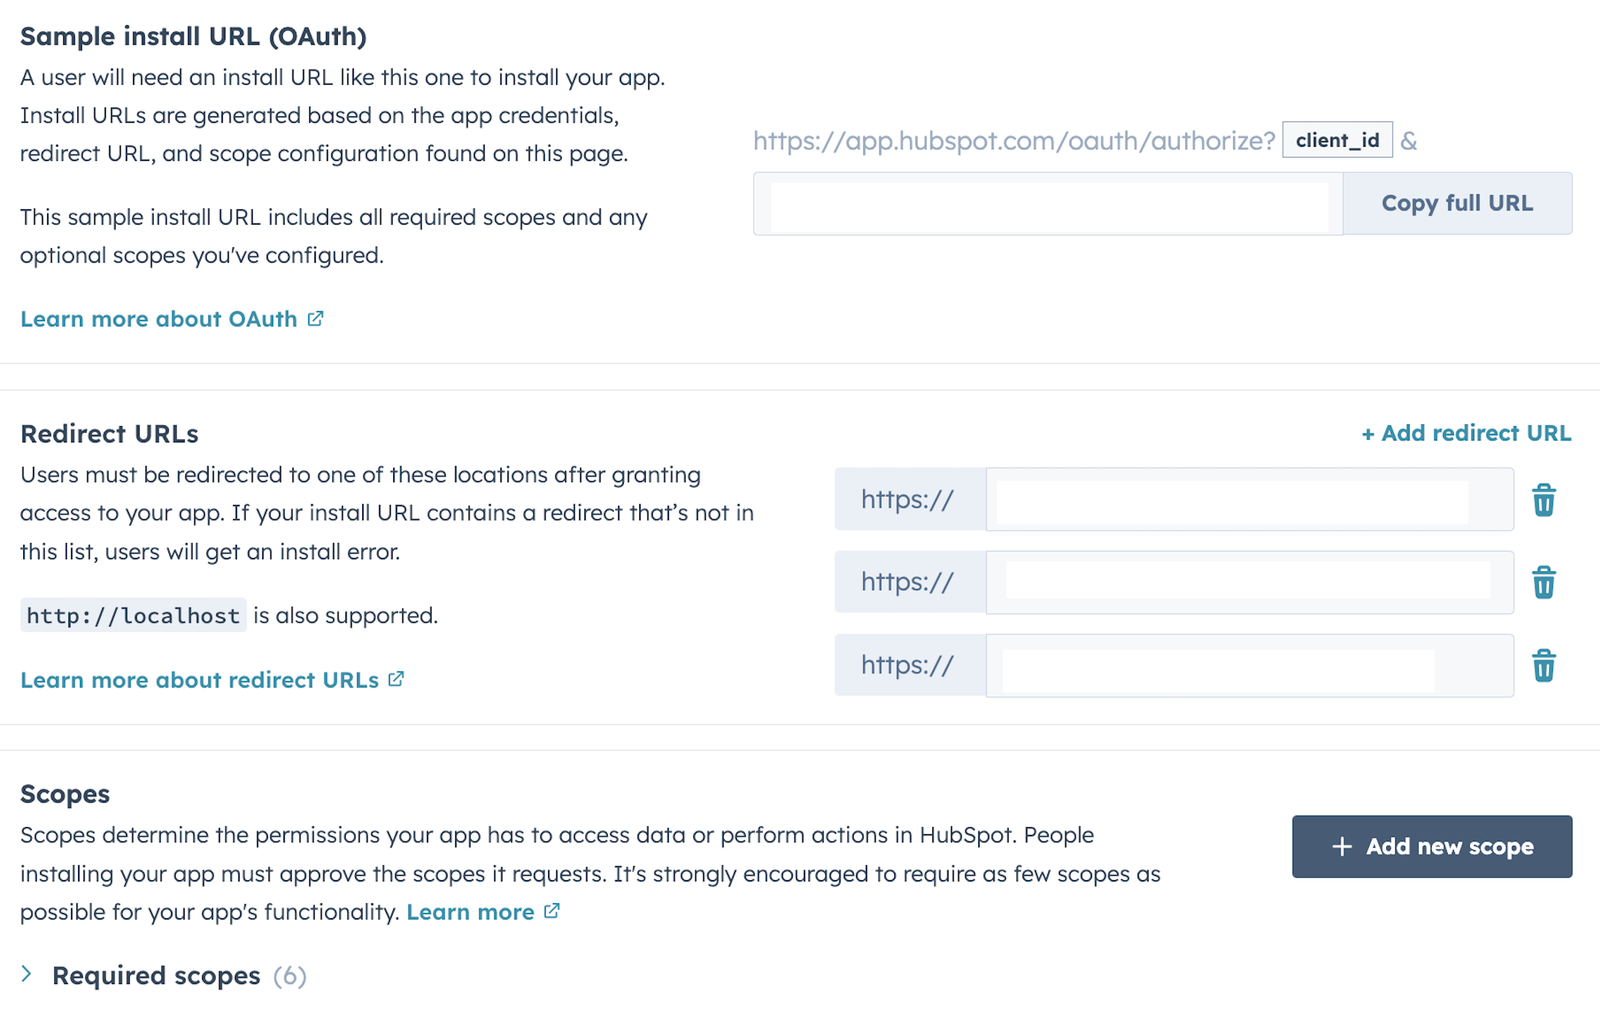
Setup OAuth URL, Scopes & Redirect URLs on HubSpot
Once you have made changes and save all configurations on Drupal website for HubSpot Integrations, do not forget to set OAuth URL, Redirect URL and scopes on your HubSpot account.
That's it! Your Drupal website should now be integrated with HubSpot, allowing you to leverage HubSpot's marketing and CRM capabilities within your Drupal environment.
Additional Configuration (if necessary)
Depending on your specific requirements, you may need to configure additional settings in the HubSpot module to customize the integration further. This might include setting up form integrations, configuring tracking codes, or enabling specific features provided by the module.
Sync Drupal Forms (Webforms) with HubSpot
Syncing Drupal forms with HubSpot allows you to capture form submissions directly into your HubSpot CRM and leverage HubSpot's marketing automation and lead nurturing capabilities. Here's how you can sync Drupal forms with HubSpot.
To manage more customized forms in Drupal you should use Webforms module as it allows configurations to connect or syncronize data with HubSpot as well marvelously.
So let start download install webforms module using composer based command line. Run the following command on your drupal root directory, insider your terminal.
composer require 'drupal/webform:^6.3@beta'Now enable webforms module using following drush command:
drush en webform -yIf you want to enable additional sub modules related to 'Weforms', you can manually install them from here : /admin/modules
Now you can do all of your required configurations for 'Webforms' module by navigating to this path: /admin/structure/webform/config
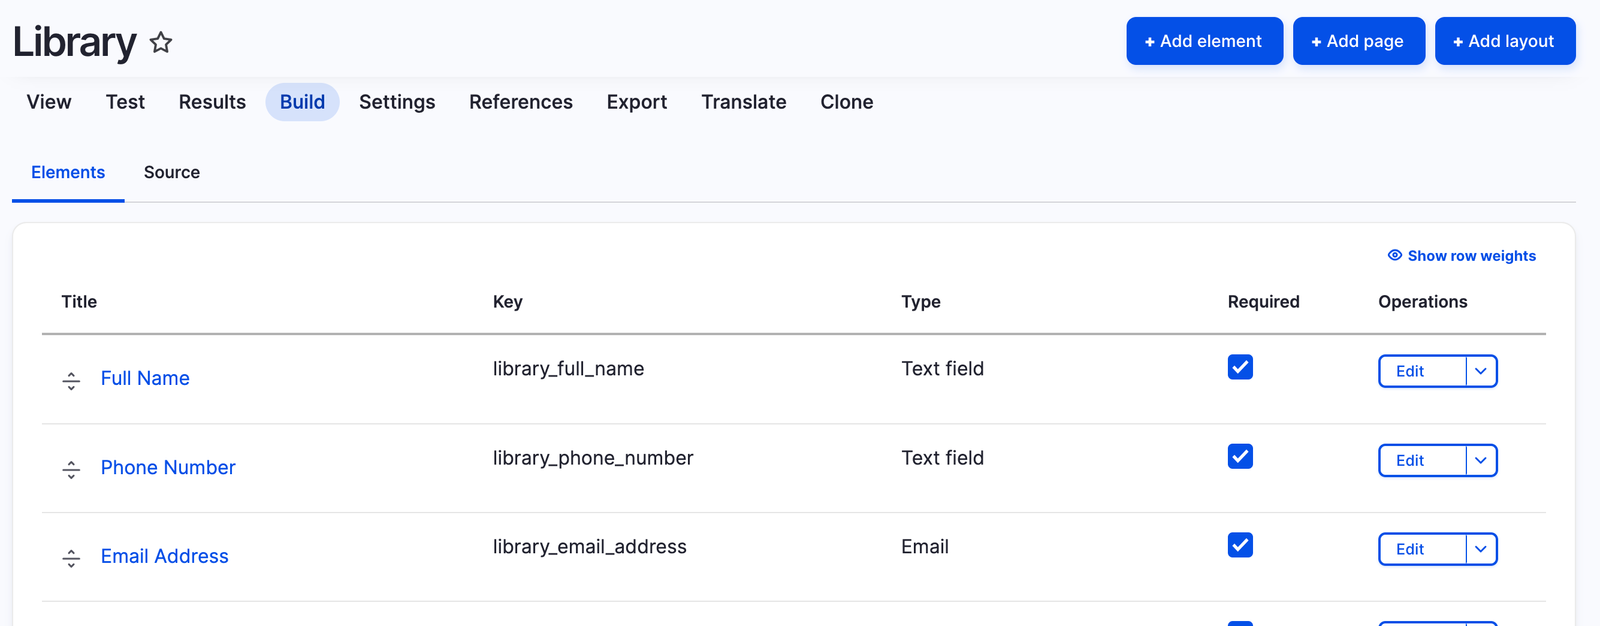
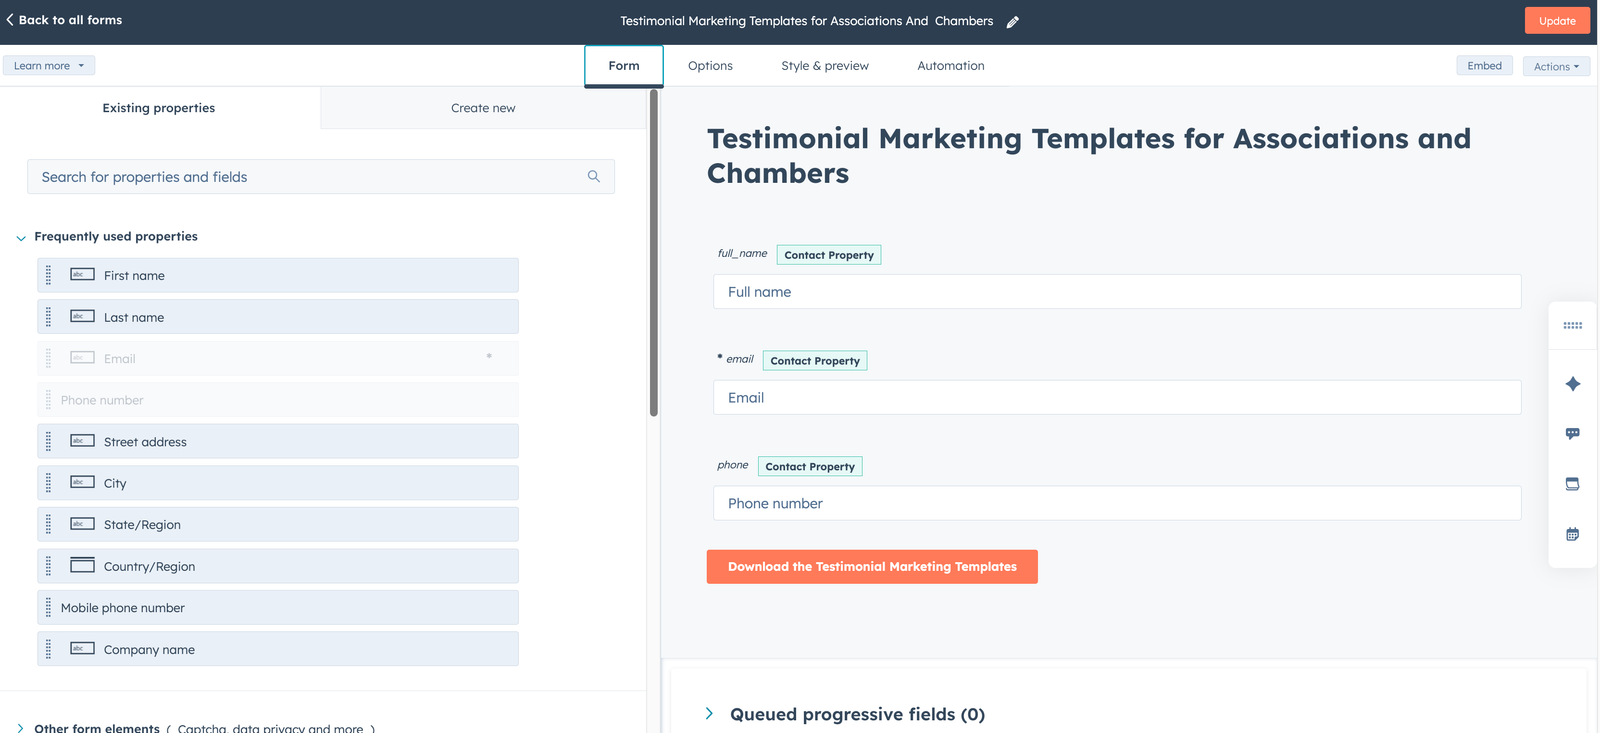
Now its time to create new webform by clicking on the 'Add webform' button. Lets say you name your form to be "library".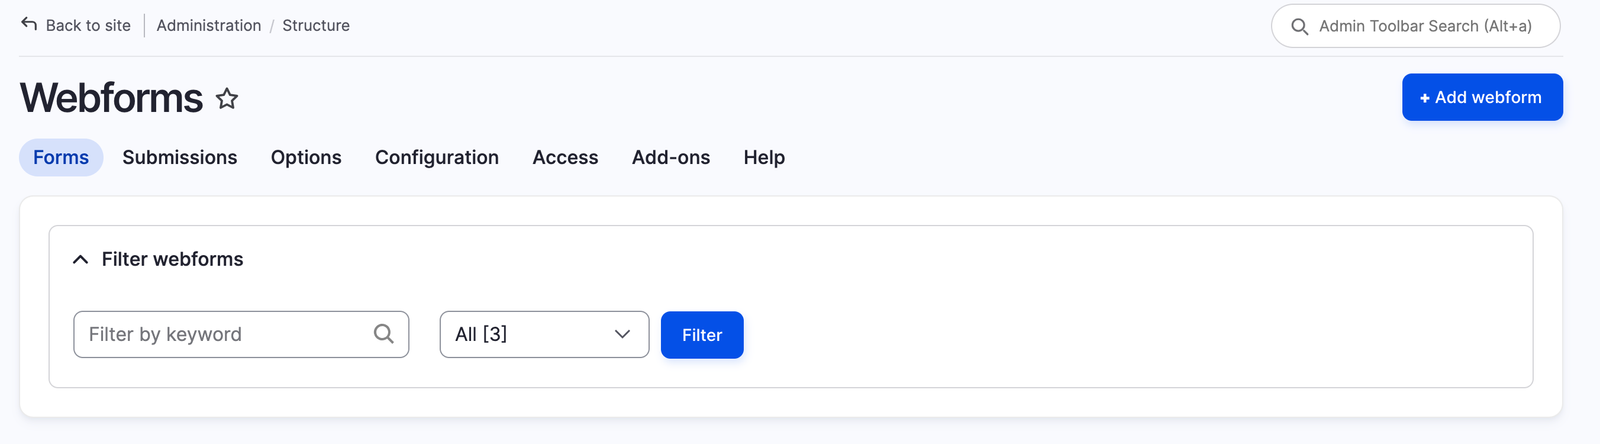
Create form fields into 'library' form you have created by navigating to : /admin/structure/webform/manage/library
Map Drupal Webform fields with HubSpot Form Fields
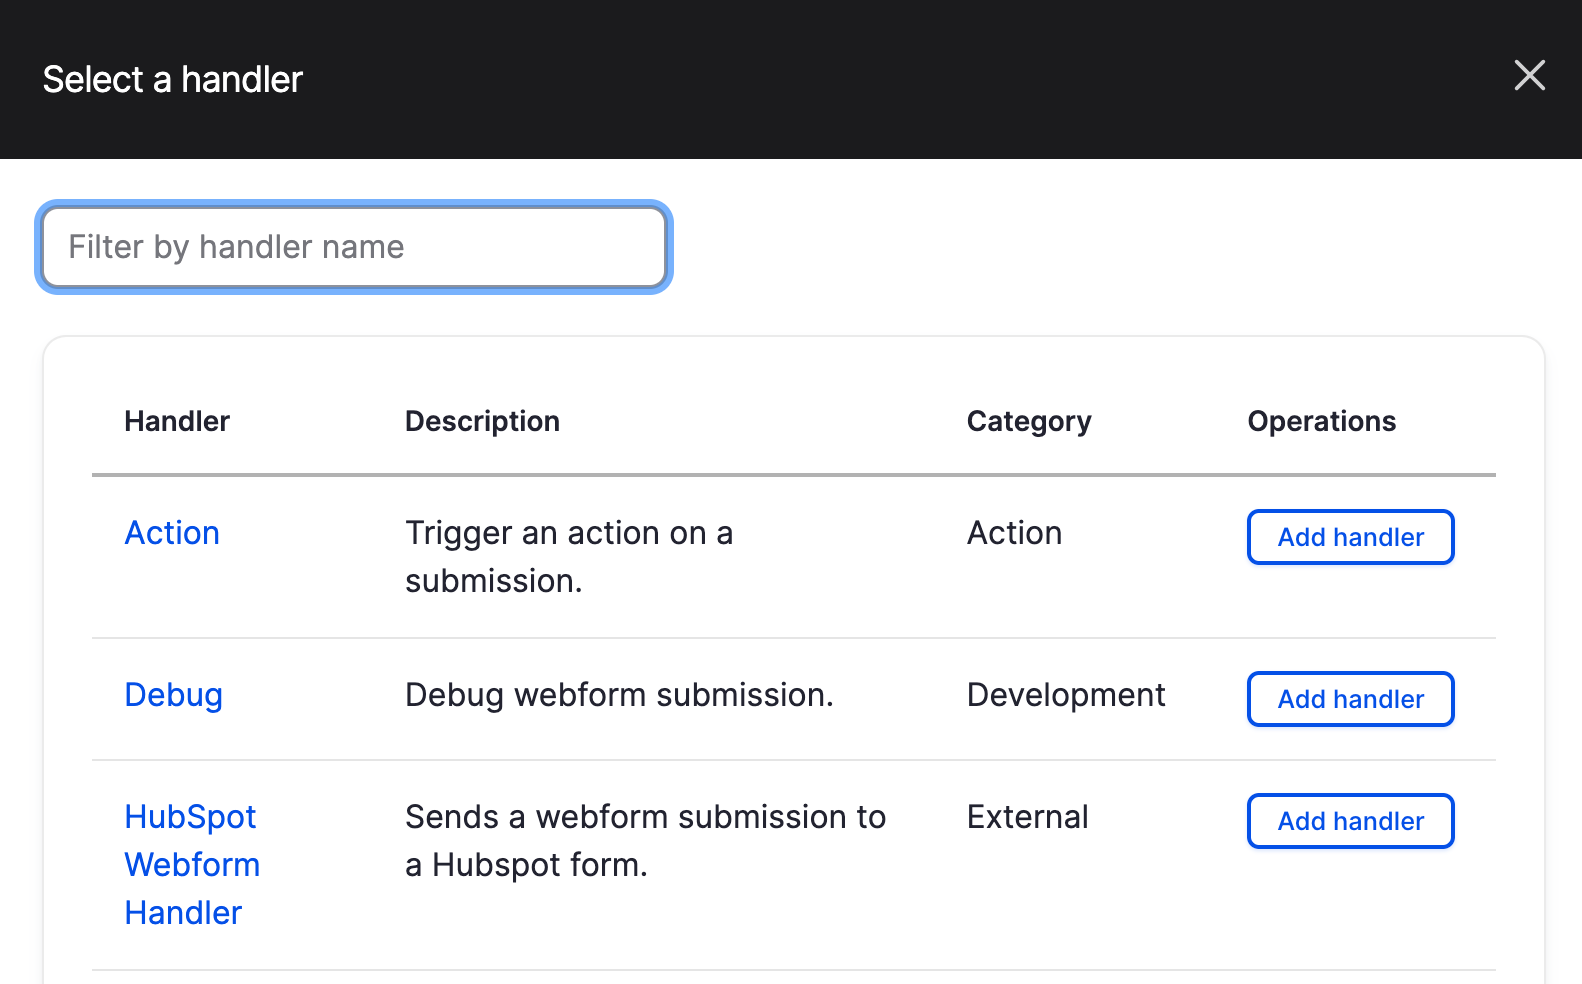
Add Hubspot Webform handler to Map Form Fields
You have to add 'HubSpot Webform Handler' so you can map drupal webform fields with HubSpot form fields by visiting this URL: /admin/structure/webform/manage/library/handlers
Click on 'Add Handler' button.
Contact me as I am a Drupal Developer with Hubspot Expertise to help you HubSpot Integration with your Drupal websites.
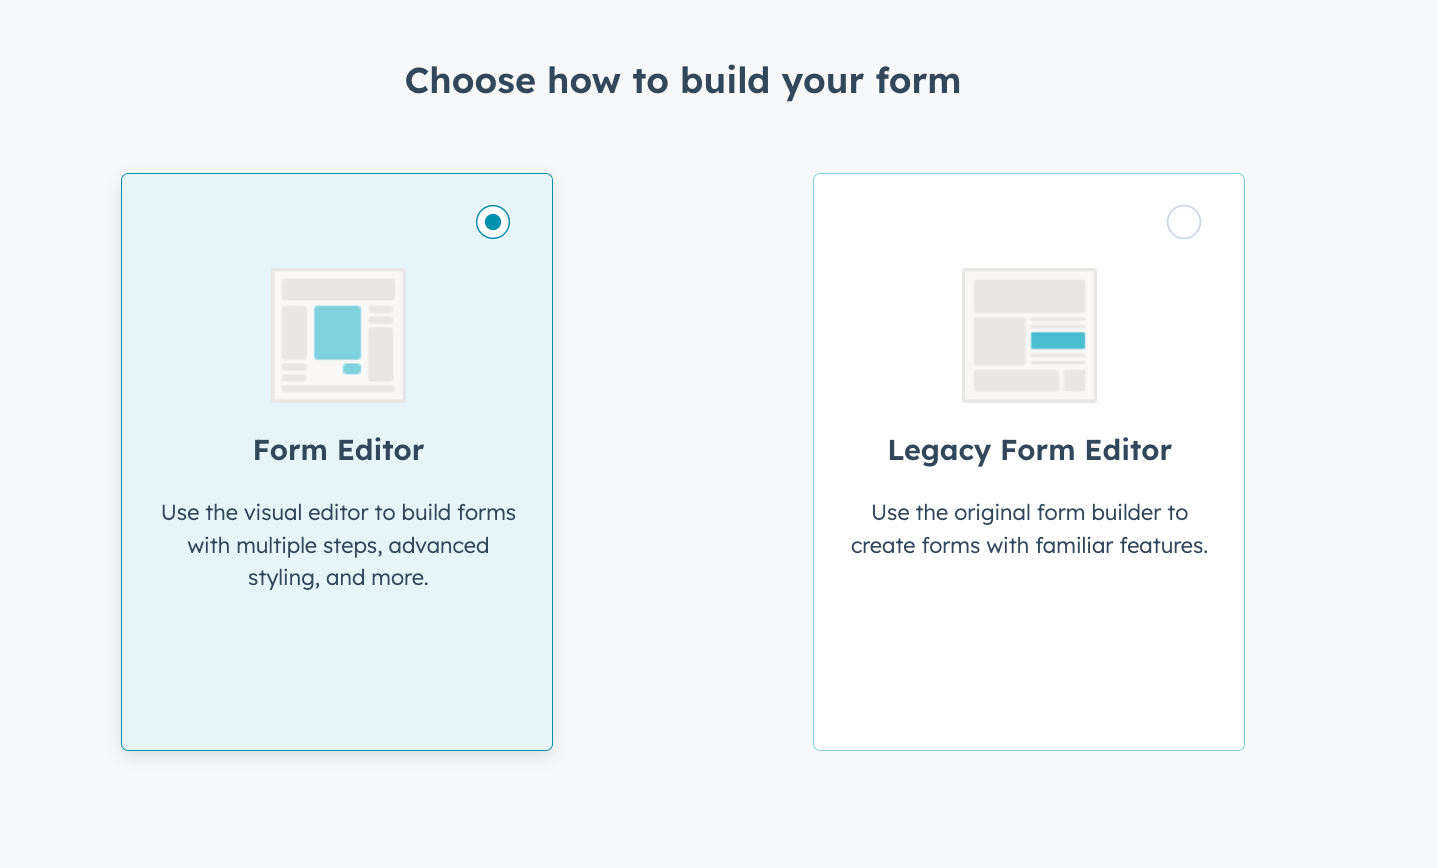
Let's create form on the hubspot.com to map fields with Drupal webform form. Login to your hubspot.com account and click on the following link : https://app.hubspot.com/forms/0000000/views/all_forms, replace 0000000 with your account ID.
Here you can choose 'Form Editor' as the option and click on "Next" button. Create all form fields that you have created on Drupal webform.
For each form field you've selected for synchronization, you'll need to map the form fields to corresponding fields in HubSpot.
HubSpot provides various default properties (e.g., first name, last name, email) that you can map your form fields to. You can also create custom properties in HubSpot if needed.
Test Form Submissions
After mapping the form fields, test the form submissions to ensure that data is being captured correctly in HubSpot.
Fill out the form on your Drupal website and submit it. Check your HubSpot dashboard to verify that the submission appears in your CRM.
Set Up Workflows and Automations on HubSpot
Once form submissions are successfully syncing with HubSpot, you can set up workflows and automations in HubSpot to nurture leads, send follow-up emails, assign tasks to sales representatives, etc.
Utilize HubSpot's marketing automation tools to engage with leads and move them through the sales funnel.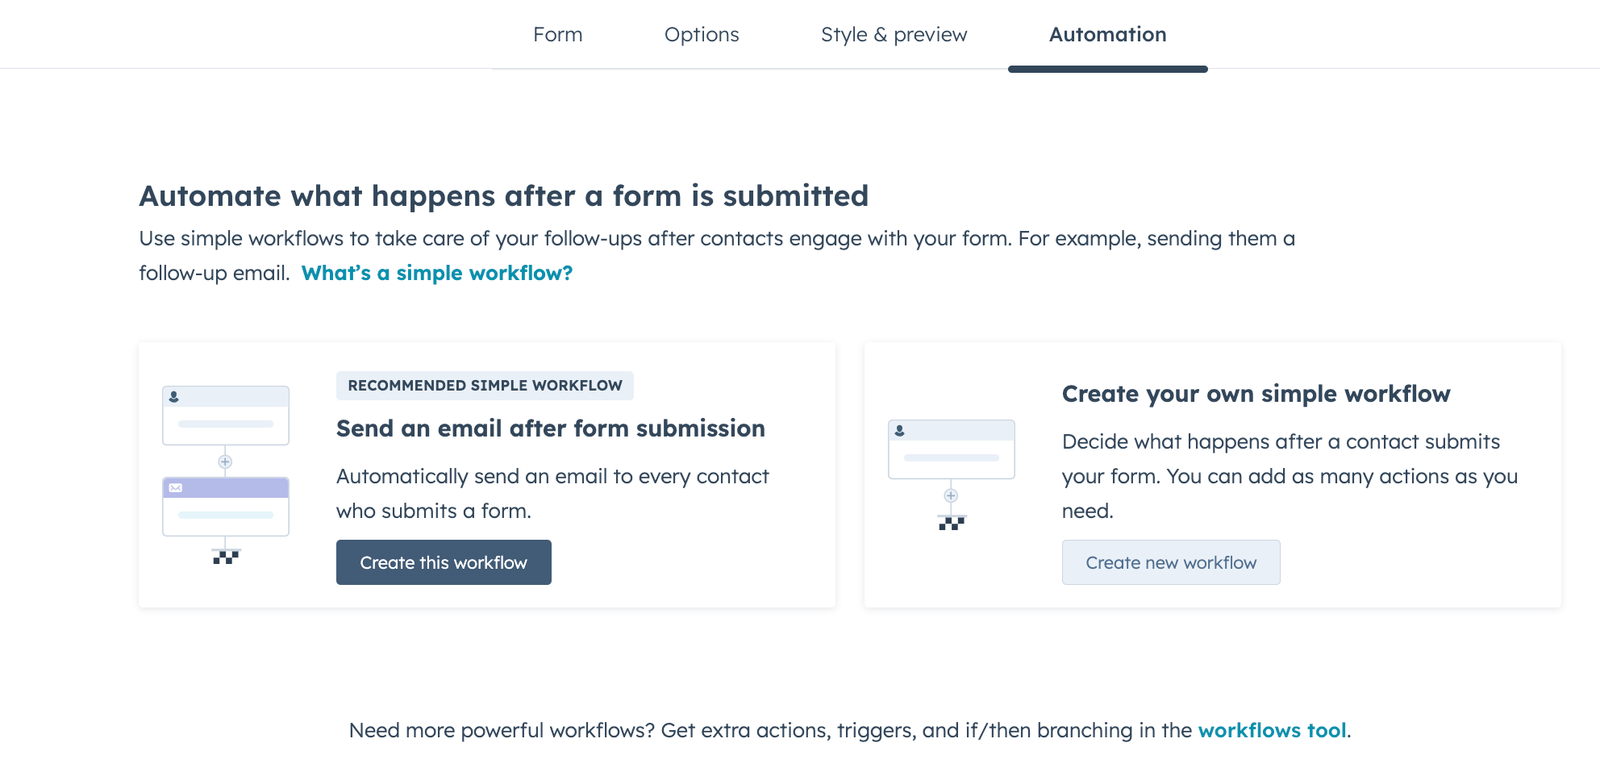
Monitor and Analyze Results
Regularly monitor the performance of your synced forms and analyze the data captured in HubSpot.
Use HubSpot's reporting and analytics features to track form submissions, conversion rates, and other relevant metrics.
By syncing Drupal forms with HubSpot, you can streamline your lead generation and marketing efforts, improve lead management, and ultimately drive better results for your business.
Tracking website activity with HubSpot allows you to gain valuable insights into how visitors interact with your Drupal website. This information can help you optimize your website's performance, improve user experience, and tailor your marketing efforts to better meet the needs of your audience. Here's how you can track website activity using HubSpot.
Install and Configure HubSpot Tracking Code
Log in to your HubSpot account.
Navigate to the "Tracking Code" settings. This is usually found under "Settings" > "Tracking Code" or a similar menu option.
Copy the HubSpot tracking code provided in the dashboard.
You can find it on the following URL : https://app.hubspot.com/settings/0000000/analytics-and-tracking/tracking
<!-- Start of HubSpot Embed Code -->
<script type="text/javascript" id="hs-script-loader" async defer src="//js.hs-scripts.com/0000000.js"></script>
<!-- End of HubSpot Embed Code -->
Paste Tracking Code into Drupal Theme or Module
Access the files of your Drupal theme or create a custom module where you can add the HubSpot tracking code.
If you're adding the tracking code to your theme, locate the appropriate template file (e.g., page.html.twig, html.html.twig) where you want to insert the code.
Paste the HubSpot tracking code just before the closing </head> tag in the template file.
Test Tracking Code Installation
After adding the tracking code to your Drupal website, it's essential to test whether it's working correctly.
Visit your website in a web browser and use browser developer tools or browser extensions to confirm that the HubSpot tracking code is present in the HTML source code of your web pages.
Track Specific Events (Optional)
In addition to basic pageview tracking, you can set up HubSpot to track specific events on your website, such as form submissions, button clicks, downloads, and more.
Use the HubSpot JavaScript API or built-in features to track these events. You may need to add additional JavaScript code to your Drupal theme or modules to trigger these events.
Analyze Website Activity in HubSpot
Once the tracking code is installed and events are being tracked, you can analyze website activity in your HubSpot dashboard.
HubSpot provides reports and analytics tools that allow you to see metrics such as page views, sessions, bounce rates, top-performing pages, and more.
Use Data to Inform Marketing Strategies
Utilize the insights gathered from website activity tracking to inform your marketing strategies.
Identify high-performing content and optimize underperforming pages. Tailor your content and marketing efforts based on visitor behavior and engagement patterns.
Continuously Monitor and Optimize
Website activity tracking is an ongoing process. Continuously monitor your website's performance and make adjustments as needed to improve user experience and achieve your marketing goals.
By tracking website activity with HubSpot, you can gain a deeper understanding of your audience and make data-driven decisions to enhance your online presence and drive business growth.
Personalization and Marketing Automation
With the integration in place, you can leverage HubSpot's marketing automation tools to create personalized experiences for your website visitors. This might include personalized content based on their past interactions, automated email campaigns triggered by specific actions on your site, and more.
CRM Integration
If you're using HubSpot's CRM, you can also integrate it with your Drupal website to keep track of leads, contacts, and deals. This allows you to have a unified view of your contacts and their interactions with your website.
Custom Development
Depending on your specific requirements, you may need to develop custom functionality to fully integrate HubSpot with your Drupal website. This could involve writing custom modules or using Drupal's API to interact with HubSpot's API.
Overall, integrating HubSpot with Drupal can provide you with powerful marketing and CRM capabilities to help you engage with your website visitors more effectively and drive better results for your business.
Conclusion
In conclusion, integrating HubSpot with Drupal can enhance marketing effectiveness, streamline lead generation and nurturing, and improve overall customer engagement. However, businesses should carefully assess the technical requirements, costs, compliance considerations, and ongoing maintenance needs before implementing the integration. With proper planning and execution, the HubSpot-Drupal integration can be a valuable asset in driving growth and success for businesses online.